From Your TikTok Feed to Your Floor: A Step by Step Guide to Making Your First Tufted Rug
Stop scrolling TikTok and start tufting! Here is a fun, step-by-step guide to making your very first custom rug this weekend, from design to final shave.
PROJECTSHOW TO
Caro
1/24/20264 min read

This site contains affiliate links. As an Amazon Associate, I earn from qualifying purchases at no extra cost to you.
Okay, bestie. It’s go time.
Your Amazon boxes are here. Your tufting gun is looking at you from across the room. You have a free weekend.
We are going to take that pile of supplies and turn it into something you can actually put on your floor and brag about on Instagram. No more excuses. No more "I'm just researching." We are doing this.
Here is the start-to-finish reality of making a rug, stripped of the speedy TikTok filters. It’s loud, it’s messy, and it’s incredibly fun. Let’s make a rug.
Phase 1: The "Vibe Check" (Design & Prep)
Before we touch a power tool, we need a plan.
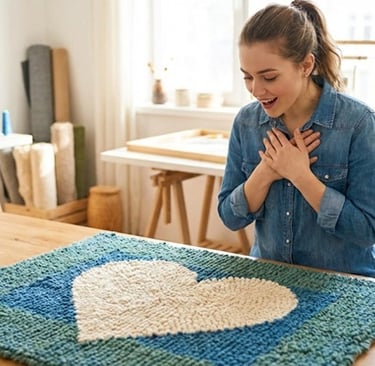
1. Pick a Design That Won't Make You Cry Listen to me: Do not try to tuft a hyper-realistic portrait of your dog for your first project. You will fail, and you will be sad. Start simple. Organic shapes, wavy blobs, a simple flower, or a y2k-style heart. You need practice controlling the gun before you try complex details.
2. The Setup Get your frame clamped to the table. Now, stretch your Primary Tufting Cloth over the tack strips. Reminder: Stretch it until your fingers hurt. Then stretch it more. If you flick it and it doesn't sound like a tight drum, it’s too loose. Saggy cloth = ripped rugs. Don't say I didn't warn you.
3. Trace It Set up your cheap mini projector, turn off the lights, and cast your design onto the cloth. Crucial Step: FLIP YOUR IMAGE HORIZONTALLY BEFORE YOU TRACE. Remember, we are working from the back! If you don't flip it, your text will be backward, and everyone will laugh at you. Trace it with a chunky permanent marker.
Phase 2: The "Main Event" (Tufting)
This is the part you came here for. The noise. The speed. The fluff.
1. Gear Up Put on your safety glasses (because flying needles aren't cute). Tie your hair back. Thread your gun with your first color of yarn. We recommend doubling up—feed two strands of yarn into the gun at once for a thicker, faster fill.
2. Outline First Start by tracing the outline of your shapes. Get a feel for the speed. Remember to push HARD into the cloth. You are the boss; the gun is just the employee.
3. Fill It In Once the outlines are done, start filling in the shapes with rows of tufting. This is the most satisfying part. It’s like coloring with a loud, vibrating crayon. Watching that empty space fill up with fluffy yarn is pure serotonin. Don't worry if the back looks messy—all the magic is happening on the other side.
Phase 3: The "Messy Middle" (Gluing)
You finished tufting! You flipped the frame over and gasped at how cute the front looks!
Now comes the gross part. The part nobody shows on TikTok.
Your rug right now is just loose yarn held by thoughts and prayers. If you pull a strand, it comes out. You need to lock it down.
1. The Goop Grab your bucket of carpet adhesive and a putty knife. Spread a thin, even layer over the entire back of the rug while it's still on the frame. It smells weird. It’s sticky. Just embrace it.
2. The Hardest Part: Waiting You have to let it dry completely. That means 24 hours. Do not touch it. Do not poke it. Go outside. Live your life. Let the glue cure.
Phase 4: The "Glow Up" (Finishing)
24 hours later, the glue is dry. It’s time for the reveal.
1. Cut It Down Use a box cutter to slice the cloth off the frame, leaving about an inch or two of border around your rug.
2. The Hot Glue Battle Plug in your industrial hot glue gun. Get those nasty glue sticks ready. Flip the rug face down. You are going to fold that extra inch of border cloth over onto the dried glue back and hot glue it down. This is called "waterfalling." You will probably burn your fingers at least once. It's a rite of passage.
3. Back It Up Your rug now has folded edges, but the back is still ugly dried glue. Grab your Spray Adhesive and your final backing cloth (felt or non-slip fabric). Spray the back of the rug, lay the cloth over it, and smooth it down.
4. The Shave (ASMR Time) Flip that bad boy over. It probably looks a little shaggy and uneven. Grab your Rug Carving Clippers. This is where a messy craft project becomes a professional-looking product. Shave the top layer down to get an even pile height. Use the corner of the clippers to carve "valleys" between your colors to make the design pop.
This part is oddly meditative and incredibly messy. You will be covered in colorful yarn dust.
The Final Reveal
Vacuum up the gallon of yarn dust you just created. Take a lint roller to your new rug.
Lay it on the floor. Step back.
Look at that! You made that! With a power tool and some string! It might have a few wonky lines, and maybe one corner is a little weird, but it’s yours.
Now, take 500 photos of it, post it on TikTok with a trending audio, and tag me so I can hype you up. Then, immediately start planning your next one because, trust me, you’re addicted now.
Cozy updates on tuft rugs and tufting tips
Contact
Hello@TuftMom.com
© 2026. All rights reserved.