Tufted Keychains for Beginners: Tiny Projects, Big Satisfaction (And Zero Commitment Issues)
Tufted keychains are the perfect beginner project! Learn to make these quick, low cost mini rugs in under 20 minutes using yarn scraps.
HOW TOPROJECTS
1/28/20269 min read
Tufted Keychains for Beginners: Tiny Projects, Big Satisfaction (And Zero Commitment Issues)
This post contains affiliate links to Amazon products. If you purchase through these links, I may earn a small commission at no additional cost to you. These commissions help keep Tuft Mom running and fund questionable yarn purchasing habits.
So you've been tufting-curious but commitment-phobic. You want to dip your toe in the tufting pool without diving headfirst into a full rug project that'll consume your life for the next three weeks. You want something cute, quick, and honestly? Something you can finish while binge-watching a single episode of your favorite show.
Welcome to tufted keychains: the espresso shots of the tufting world. Small, potent, and surprisingly addictive.
These little guys take 15-20 minutes to make, cost pennies in materials, and are so ridiculously cute that people will literally beg you to make them one. Plus, they're the perfect project for testing out new techniques, color combinations, or just procrastinating on that big project you're avoiding.
Oh, and did I mention they make EXCELLENT gifts? Because nothing says "I thought of you" quite like a handmade mini tufted masterpiece attached to some keys.
Why Keychains Are Actually Genius for Beginners
They're FAST - We're talking 15-20 minutes from start to finish. You can knock out five in an hour. Instant gratification is real, people.
They're forgiving - Mess up? Cool, you spent 15 minutes. Not 15 hours. Big difference in the emotional damage department.
They use scraps - Got leftover yarn from other projects? Perfect. You need like 3 feet of yarn per keychain. Your yarn stash finally has a purpose beyond looking pretty in bins.
They're portable - Unlike a massive rug frame, you can tuft keychains with a tiny embroidery hoop that fits in a tote bag. Craft night at a friend's house? Bring your keychain setup.
They sell like hotcakes - If you ever decide to monetize your new hobby, keychains are gateway drugs. People buy them for $10-15 each at craft fairs. Just saying.
You can experiment without consequences - Want to try a weird color combo? Test it on a keychain. Want to see if you can tuft a tiny flower? Keychain it. Low stakes, high reward.
What You Need From Amazon (The Bare Minimum Edition)
The Absolutely Non-Negotiable Stuff
Cut Pile Tufting Gun - Same one you'd use for any tufting project. If you already have one from making coasters or attempting that rug, you're golden. If not, grab a basic electric model. We're making keychains, not the Sistine Chapel.
Primary Tufting Cloth - A single yard will make literally dozens of keychains. Maybe hundreds. You'll get bored before you run out of fabric.
Small Embroidery Hoop (4-6 inches) - Perfect size for keychain work. You can find these for like $5. Get a few if you want to have multiple projects going at once, you overachiever.
Acrylic Yarn Scraps - Literally any weight works, but worsted is easiest for beginners. Raid your stash, use leftovers, or grab a cheap multi-pack on Amazon. Each keychain needs maybe 10-15 yards of yarn total. That's nothing.
Keychain Hardware - Split rings, lobster clasps, or keychain loops. Amazon sells these in bulk for dirt cheap. Get a variety pack so you have options.
Small Sharp Scissors - For trimming and detail work. Nail scissors or embroidery scissors work great. Don't use your fabric scissors—you need tiny precision here.
Fabric Glue or Hot Glue Gun - To seal the back and attach the hardware. Hot glue is faster, fabric glue is slightly neater. Both work.
Felt Scraps - For backing. You need circles the size of a quarter. A single felt sheet makes like 50 keychains. Get a variety pack of colors.
The Nice-to-Have Extras
Small Circle or Shape Templates - Cookie cutters work too! Anything to trace around for consistent shapes.
Fabric Marker (Fine Tip) - For drawing your tiny designs. The chunkier markers are too big for keychain work.
Clear Acrylic Sealer Spray - Makes your keychains more durable and weather-resistant. Optional but nice if you're gifting them.
Jump Rings, Charms and Beads - To add dangly bits to your keychains for extra flair. Because why not?
The Step-by-Step (Keychain Edition)
Step 1: Set Up Your Mini Workspace
Stretch that monk's cloth in your tiny embroidery hoop. Yes, it needs to be tight. Yes, even for something this small. Physics doesn't care about your project size.
Find a comfy spot with good lighting. You're working small, so you need to actually see what you're doing. Squinting is not a technique.
Step 2: Design Your Keychain
Here's where you need to embrace the concept of SMALL. Your keychain should be 1.5 to 2.5 inches max. Any bigger and it's awkward on actual keys. Any smaller and you'll lose your mind trying to tuft it.
Easy beginner shapes:
Simple circle (solid color or two-tone)
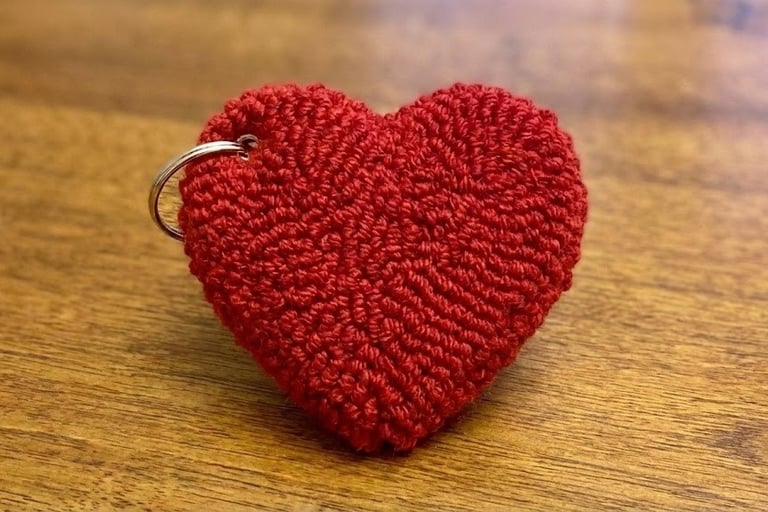
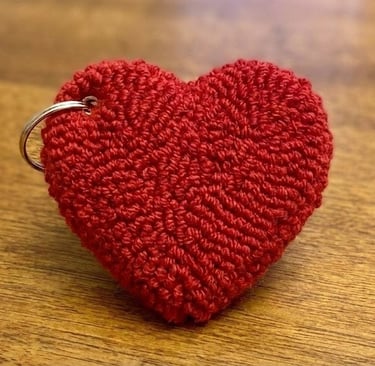
Heart shape
Star
Smiley face
First initial
Tiny flower
Mushroom
Cloud
Mini rainbow
Simple geometric shapes
Draw your design on the fabric with your fine-tip marker. Keep lines clean and simple. Detail is the enemy when you're working at this scale.
Step 3: Thread and Tuft
Thread your gun like normal. If you've made coasters, you know the drill. If this is your first project... well, you're brave. Watch a threading tutorial first.
Tufting tiny things requires:
SLOW speed - Like, grandma-driving-in-a-school-zone slow
Steady hands - Coffee might be a bad idea before this
Close loop spacing - These babies need to be dense
Patience - Cannot stress this enough
Start from the outside and work in, just like with coasters. Keep your gun perpendicular. Fill in your shape completely. Yes, it's tedious. Yes, it's worth it.
Color changes: If you're doing multiple colors (like a rainbow or a flower with different parts), just stop, cut, rethread, continue. Simple! Each section might only take 30 seconds anyway.
Step 4: Trim Like Your Life Depends On It
This is where your keychain goes from "cute craft blob" to "actual recognizable object."
Turn off your gun. Assess your work. You'll have some loops sticking up, some uneven bits. That's normal.
Trim EVERYTHING to a consistent, SHORT height. We're talking maybe 1/4 inch pile height. Keychains need to be flat-ish to function. Nobody wants a poofy keychain that doesn't fit in their pocket.
Use your small scissors to really define the edges. Crisp lines make all the difference. Take your time. Trimming is meditation. Trimming is life.
Step 5: Cut It Out
Remove your tufted piece from the hoop. Cut around your shape leaving about 1/4 inch border of fabric. Less border than coasters because space is precious at this scale.
Be careful not to cut too close to your tufted edge or it'll all unravel and you'll have to start over while cursing at yarn.
Step 6: Seal and Finish
Flip it over. Look at that beautiful mess of yarn backs.
Hot glue method (fast and easy):
Apply hot glue generously over the entire back
Fold in those fabric edges and press them down
Work quickly before the glue sets
Let it cool completely
Fabric glue method (neater but slower):
Brush fabric glue over all the yarn ends
Fold in edges
Let dry for several hours
Come back and add more glue if needed
Cut a felt circle slightly smaller than your keychain. Glue it to the back to cover all the mess.
Step 7: Add Hardware
While the glue is still slightly tacky (if using fabric glue) or reheat the edge a tiny bit (if using hot glue), press your keychain hardware into the top edge. You want it embedded in the glue for security.
Alternatively, punch a small hole through the fabric edge, thread a jump ring through, and attach your keychain clasp. This method is more secure for heavy-duty use.
Step 8: Optional Embellishments
Feeling fancy? Add:
Beads on the keyring
Tiny tassels
Bells (if you hate yourself)
Multiple keychains on one ring
Charms or trinkets
Go wild. This is your chaotic craft kingdom.
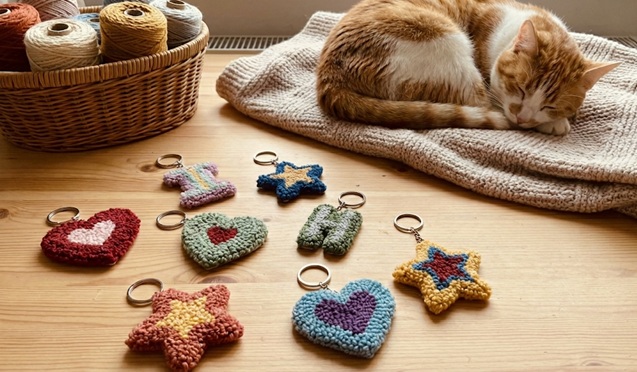
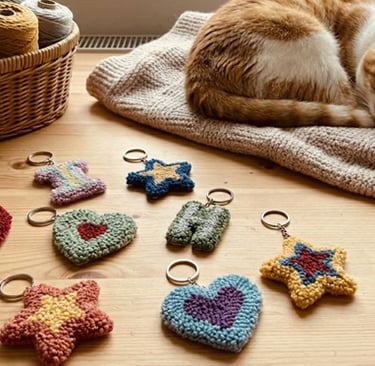
Design Ideas That Actually Work at Tiny Scale
Single Color Shapes - Sometimes simple is best. A perfect little heart in hot pink? Chef's kiss.
Initials - Everyone loves personalized stuff. Block letters work better than cursive at this size.
Mini Food Items - Tiny strawberry, lemon slice, avocado, pizza slice, donut. Cute overload.
Smiley Faces - Classic, easy, universally loved. Two dots and a curved line = instant charm.
Two-Tone Designs - Half one color, half another. Easy peasy color change practice.
Tiny Animals - Very simplified versions. Think: round cat face, simple dog silhouette, basic butterfly.
Symbols - Hearts, stars, moons, peace signs, music notes.
Pride Flags - Tiny rainbow stripes are actually pretty easy and make great gifts.
Seasonal Themes - Mini pumpkins, snowflakes, flowers, leaves.
Abstract Color Blocks - Just random sections of color. Call it modern art. People will think you're deep.
Common Tiny Disasters (And Fixes)
"My keychain is a wonky blob"
The problem: Your shape isn't holding its form.
The fix: Trim more aggressively around the edges. Define that shape with scissors. Be ruthless.
"The yarn is falling out everywhere"
The problem: Not enough glue, or your fabric was too loose.
The fix: More glue. Like, way more. Don't be stingy. Also, tighter fabric next time.
"It's too puffy and won't lay flat"
The problem: Your pile height is too high.
The fix: Trim shorter. Way shorter. You can always leave it fluffy on purpose, but flat is more functional.
"The hardware fell off"
The problem: Not enough glue securing it, or you attached it before the glue was ready.
The fix: Use a jump ring through the fabric for a more secure attachment. Or use way more hot glue.
"I can't get details small enough"
The problem: You're trying to tuft the Mona Lisa at 2 inches.
The fix: Simplify your design. Accept that some things don't translate to mini scale. Embrace the cute blob aesthetic.
What to Do With All These Keychains
You've made twelve keychains in one sitting. You got into a groove. Now what?
Gift them - Birthday presents, stocking stuffers, "thinking of you" gifts, teacher appreciation, basically any occasion ever.
Sell them - Etsy, Instagram, local craft fairs. People pay actual money for these.
Keep them - Put them on your keys, bags, backpacks, zippers, pet collars (if your pet tolerates accessories).
Trade them - Other crafters love trading handmade goods. It's like adult friendship bracelets.
Make a matching set - Keychains for your whole friend group, each in their favorite color.
Use them as bag tags - Luggage tags, gym bag identifiers, cute dangly bits for purses.
Attach them to gifts - Instead of a bow, add a little tufted keychain. Fancy!
Level Up: Once You've Made a Dozen
Feeling confident? Try these challenges:
Add embroidery - Stitch on details like faces, letters, or outlines after tufting.
Mix textures - If you have both cut and loop pile guns, use both on one keychain.
Go 3D - Make a slightly stuffed keychain by adding batting before sealing the back.
Make matching sets - Coordinate colors for a cohesive collection.
Try unusual shapes - Asymmetric designs, abstract blobs, whatever your heart desires.
Add dangly bits - Beads, chains, mini tassels for extra movement and flair.
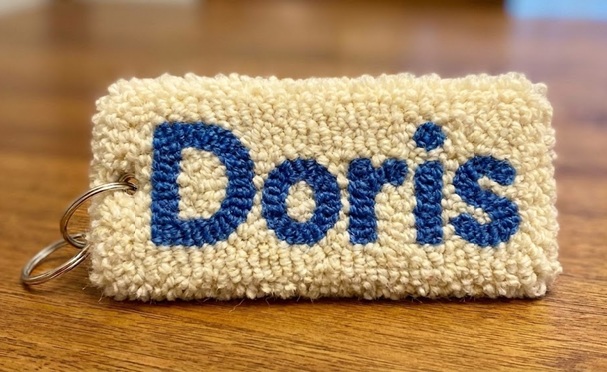
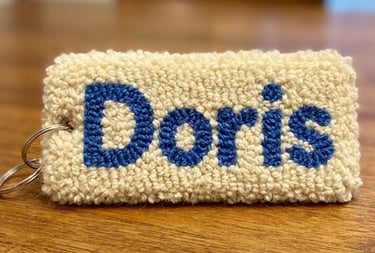
Personalize with names - Tiny name tags are harder but totally doable with practice.
The Real Talk: Why Tiny Projects Matter
Look, I know your Pinterest board is full of those massive statement rugs with intricate designs. I know you want to make something IMPRESSIVE. And you will!
But starting with tiny projects like keychains isn't admitting defeat—it's being smart. Every minute you spend on a keychain is a minute you're building:
Motor skills - Your hands are learning the gun's movements
Tension understanding - You're feeling how tight/loose affects results
Color theory - Experimenting with combos risk-free
Finishing techniques - Gluing, backing, and hardware attachment translate to bigger projects
Design confidence - Proving to yourself that yes, you CAN make cute things
Plus, you'll have a drawer full of adorable keychains instead of one half-finished rug you hate looking at. Progress is progress, no matter the size.
Your Amazon Shopping List (The Mini Edition)
Ready to make some tiny tufted magic? Here's your cart:
Electric tufting gun (cut pile)
Primary tufting cloth (1 yard makes dozens)
Small embroidery hoop (4-6 inches)
Acrylic yarn in fun colors (even scrap yarn works!)
Keychain hardware (split rings, clasps, variety pack)
Felt sheets (variety pack)
Optional: Shape templates, jump rings, beads, acrylic sealer spray
Total investment if you're starting from scratch: $100-150 (mostly the gun). If you already have a gun from other projects: under $20 for all the tiny supplies.
Final Thoughts: Small But Mighty
You don't need to go big to go home. Sometimes the best way to learn something new is to start ridiculously small and work your way up.
Keychains are low-pressure, high-reward, instant-gratification crafting at its finest. You can make one on your lunch break. You can make five while your partner watches football. You can make dozens while avoiding your actual responsibilities.
And here's the secret nobody tells you: making tiny perfect things is just as satisfying as making big perfect things. Maybe more, because you can actually finish them.
So grab that tufting gun, thread up some yarn, and make something small and wonderful. Your keys deserve better than that ratty old lanyard anyway.
Now stop reading and start tufting. Those keychains aren't going to make themselves. 🔑✨


Cozy updates on tuft rugs and tufting tips
Contact
Hello@TuftMom.com
© 2026. All rights reserved.